In this 3ds Max tutorial I'm going to show you how to perform Basic Skylight Rendering, forget Mental Ray rendering with it's Mental Ray material and MR Light or maybe Light Tracer and Radiocity, this is the simplest and easiest way of lightning. With just a few standard primitives (just text and Plane or Box) and standard Light (Skylight) you can get Great result fast. I'm using 3ds Max 2010 but this should work and doable with many older versions as well.
first all all, it's important to work on scale, this will help you to build your object on it's original scale. Go to Customize --- Unit Setup, and choose standard metering that you familiar with.
on top viewport, create a Plane according to the following parameters :
on front viewport, create a "Text" according to the following parameters :
go to Modifier List dorpdown and select "Extrude" and change the parameters as I show you :
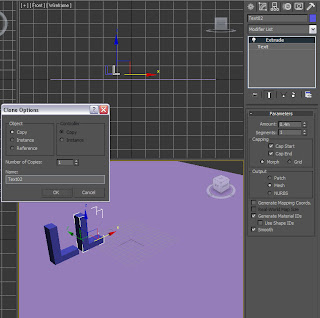
Now it's time to duplicate the "L" font. Hit and hold the "Left Shift" and select the "X" axis (axis with Red Color) and start drag and Hit "OK" on clone option
Right now I show you how to change "L" to "e". Select "L" at the Perspective Viewport and Hit "Text" in "Modifier" and go to "Parameter" and change to "e", you can repeat this step to create other text until you get group of letters/font or sentence that you want, in this case I prefer to use "leme Design" and the idea why I use separate letter is you can positioning each letter as you want with rotation and scale tools.
Next thing we're gonna do is to make a 35mm target camera in left viewport, and change the Perspective Viewport to Camera Viewport with "Right Click" Perspective --- Camera --- Camera01. Add a standard Skylight in Top Viewport, and from the Left Viewport raise the light up by selecting the "Y" axis and drag upwards.
After finish with the light, we need to change the background to white, go to Rendering --- Environment --- Background Color --- change to White
Are we done? not yet buddy, we have to add the material to each object, first we create material for Text, Hit "M" Select one of them, rename to "Material for FONT" change the parameter as I show you and use the same step for other, and for "e" material just change the "Diffuse Color" to Green
To apply material just select and hold the thumbnail (material) and start Drag and drop to object you want, oh.. I almost forgot, we have to make the "Plane" bend upwards (I'll show you next time with the basic modeling tutorial) before we hit render..
Bummm...!!


No comments:
Post a Comment